Showing posts with label 11. Coaching for November. Show all posts

Friday, November 30, 2012

Meet the farmers: Shannon & Todd


When we last met with Shannon and Todd earlier this year, they were fresh off of a year of almost zero harvest from their perfectly situated garden.

It looked great. It got tons of sun. It had automatic irrigation. They loved it OH so much. And, yet still, things hadn't gone well.

But they were ready to do whatever it was going to take to get that garden growing. They wanted tomatoes, cucumbers, peppers and herbs this summer OR BUST.

So how'd they do?

Um, "well", doesn't seem to cover it.

But let's hear it from the farmers themselves. They tell their story best.

So, you two, what was the deal with your garden? How come things weren't growing? 

Well, in hindsight, it was probably a combination of a number of things.  We bought our house a few years ago, and the spot where we decided to put our garden was so neglected that weeds wouldn’t even grow there.  We spent a couple seasons amending the soil with homemade compost, etc., but in a completely non-scientific way…We figured just putting what we determined was “good stuff” into the soil would automatically make things grow.  It most likely helped (nothing could have hurt that spot), but certainly didn’t deliver the results we were hoping for as far as garden yield…

We planted some vegetables that we bought at a local nursery, and roughly followed the guidelines for spacing, watering, etc., but really didn’t give any consideration to what plants complemented other plants in a particular growing space.  This would inevitably lead to one plant completely overgrowing another, or tomatoes growing too tall and bushy and shading other plants from the afternoon sun, etc.  We ended up with a lot of cherry tomatoes, but not much else…And there is only so much you can do with cherry tomatoes before you grow tired of them.  The other plants that did grow, just didn’t seem to pollinate, or when they did, didn’t produce very many vegetables.

Compounding the problem, we started off the season hand watering while trying to figure out what emitters and how much watering (frequency and duration) we should do via the automatic irrigation…The cutover invariably happened just as we were going on a week’s vacation, and we weren’t around to determine if the watering was sufficient or too much…

This year, Jessica came out, tested our soil, and gave us a list of amendments (type and quantity) to add to each bed based on what we were planning to grow.  She grouped complementary vegetables, herbs, and flowers into the appropriate beds, and provided a planting and irrigation plan (complete with emitter sizing) to get us going from the start…I think the results speak for themselves…It was great having more than just cherry tomatoes this year :o)


SO MUCH MORE. Also, no cherry tomatoes at all.


What did you do to fix the problem?
 
My wife called Jessica at Indie Farms!  This is where I state I was somewhat reluctant at first in that I’m a pretty handy guy (having remodeled a couple homes, landscaped and irrigated several yards, built a cabin by hand, etc.) and do most projects on my own.  I figured I could certainly figure this gardening thing out without the need for outside help…based on my results from the previous year’s garden, my wife wisely called anyway :o)

Hard to argue with that.

With your garden all fixed up, what did you decide to grow?
With somewhat limited space, the hard part for us was settling upon something we all (most of us) mutually like that would also give us the most menu flexibility.  We decided on:

Armenian cucumbers
Asian pickling cucumbers
Jalapeno peppers
Anaheim chilis
Sweet bell peppers
Better Boy tomatoes
Pink Brandywine tomatoes
Lemon basil
Sweet basil


Did you have any favorite varieties? What made them great?
 
LOVED the Better Boys and Brandywines…FULL of flavor and very consistent growers.  The Armenian Cucumbers were also flavorful and equally consistent. 

That's a lot of flavor, right there.
 
What was the best thing you did with your amazing harvests?
 

We made several batches of salsa -> included EVERYTHING from the garden … so yummy!!  We also made brochette, and cucumber/tomato salad.  We really just ate thing straight out of the garden, too.  Added to pasta dishes and salads.  Our picky toddler even gobbled everything up.  He had a lot of fun with “his garden.” 

That toddler can really cook.


What did you learn from this season's gardening and coaching that you'll use in future seasons?
 
First thing we learned was to call Indie Farms.  Jessica’s vast knowledge, planning, and advice gave us a great garden with great yields!  Seriously!  


We definitely learned (contrary to what I thought growing up, and evidenced by our previous garden) that there is more to growing a successful garden than just tilling in some compost, planting some plants, and giving them water...especially with the limited growing space many of us are left with here in Silicon Valley.  


With two kids, two dogs, and both of us working high tech jobs, not a lot of time (or desire) was left to do all the reading and research on our own.  It is money well spent bringing in someone who knows what they are doing and can get you on the right track quickly…Confined by the traditional growing seasons, aside from waiting until next year, you don’t get a lot of time for do-overs in putting in your garden...and it is not a lot of fun spending time and effort putting something in that doesn’t grow or produce like you had expected…

Unless you expect it to do REALLY well. Which we did. And it did. Get all that?
 
With summer long gone, what are you doing this winter in the garden?
 
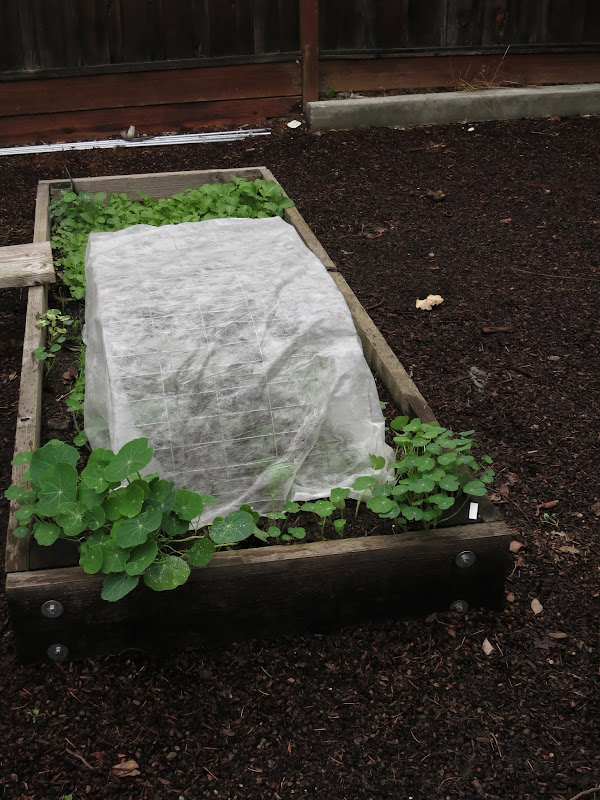
Well, we pulled the last of our ripe tomatoes, peppers, and chilis off the plants at the beginning of November, and with some quick coaching from Indie Farms, we had our winter garden in place two weeks later.  We are growing:

Broccoli
Cauliflower
Carrots
Beets
Brussel's Sprouts
Mustard greens
Spinach
Romaine Lettuce


Will you grow a kitchen garden again next spring?


Absolutely!  With a little help…

I think they meant a different kind of help, buddy. Sorry. I'll still throw the ball for you.
 

Thursday, November 29, 2012

Build a sturdy crop cover

I guess this time of year is all about cover.

Cover crops, crop covers, covering your bod from the cold...that kind of thing.

The one thing all of these coverings have in common is that they're only good if they're actually, you know, COVERING things.

What I'm trying to say is that they're no good if they're blowing around your yard or whoknowswhere instead of your cover-needing crops, am I right?

Um, do you feel a draft? I feel a draft.
It's OK, you can say it - I'm right.

Crop covers need to be sturdy, hardy and battened down so that they do their job while the winter weather rages outside with the evil cabbage moths, carrot flies and other EW GROSS NOT ON MY PLANTS YOU DON'T no-no pests that want ever so badly to consume your plants before they can produce the vegetables that you want.

So, let's build a nice sturdy crop cover, shall we?

Again, the answer here is yes.

These crop covers are good for fragile plants that need cover, but don't appreciate having the cover draped right over their little growing bodies. These covers also make it easy to cover only those plants that need cover in a multi-crop bed and they're easy to remove when you want to check on your plants' well-being between winter storms.

Build a sturdy crop cover

Materials

  1. Medium gauge wire mesh (chicken wire works well, too)
  2. Lightweight permeable cloth like this
  3. 4 clothespins
  4. 2-4 garden staples per row cover

How-To

  1. Measure the area you'll be covering and determine the final height of the plant you intend to cover. Add these two numbers together and cut your wire mesh.

    So, if your area is 2' wide and you're growing broccoli that will get to about 1' tall, you'll cut your mesh to 3'.

    This way you can form an arch tall enough to accommodate the final height of your plants.

    It doesn't need to be exact, but you don't want to end up with your plants all smashed against the cover since that could keep them from reaching their potential, inhibit air flow and other annoying no-nos.
  2. Measure out enough of the cloth so that it's at least 4 inches longer than your wire mesh, cut it and drape it over the top of your mesh.

  3. At each corner, twist up the excess cloth and pin it taught to the mesh with your clothespins.


  4. Do that on all sides.

  5. Cover your crops

  6. Pin down either end or all four corners (you decide how STAY PUT you want to be about it) with your garden staples.
That's all, folks. 

That's better. Now I can run around nude.

Wednesday, November 21, 2012

Mouth-spankingly good salad dressing

Sometimes I find myself with a giant pile of salad greens and very little inspiration. Like, I know I'm supposed to eat these greens - and furthermore I WANT to eat them - but then I get bored.

I mean, I could always just give them the old olive oil and vinegar treatment, but that gets old when you've been having salads with dinner every single night because your winter greens are exploding and so - I must dress it up. 

Thankfully we live in Northern California where winter also means citrus and we also spent a good amount of time in the summer and fall making pesto from all of the garden's basil, so a mouth-spankingly good salad dressing is only a whisk away.

That's right - a whisk away. I just made that up. I guess I'm getting cheeky around the holidays. Forgive me.

Make this dressing and then enjoy your mouth spanking.

Pesto Lemon Dressing


Ingredients
Juice from 1 Meyer lemon
1 T homemade pesto (or storebought - we don't judge)
3 T olive oil
1 T kosher salt
1 T fresh ground pepper
2 big handfuls arugula or whatever greens you have in the garden

To make
In a large bowl, whisk lemon juice, pesto, salt and pepper. When thoroughly blended, add olive oil one tablespoon at a time until completely blended.


Then toss in TO THE VERY SAME BOWL a couple big handfuls of freshly picked arugula or whatever greens you have on hand (mustard, fava leaves, spinach, beet greens, kale...) right from your garden and toss to coat.

We had a few tomatoes still sitting on the counter, so those went in, too.

That's it. Now go eat those greens.

Tuesday, November 20, 2012

Fava leaf salad

We really just grow fava beans for the fact that they fix nitrogen in the soil, so we don't even let them get to the delicious bean producing stage, but that doesn't mean we can't eat *something* that comes from these plants.

And that *something* is the leaves.

If you like the flavor of fava beans, you'll like the leaves.

Don't look at me like that - it's true. The leaves are good and they taste just like fava beans - just in leaf form.

Try it before you write me off as a nutter.

Just pluck a bunch of good looking leaves from your plants (just don't completely denude them), rinse them in cold water and then toss them with your favorite dressing (may I humbly suggest) and whatever other salad doin's you have lurking about your crisper.


Then just try and tell me that this isn't a fine, fine salad.

JUST TRY IT.

Or don't. Whatever.

Fava leaf salad

Friday, November 16, 2012

Friday, November 9, 2012

Meet the farmer: Heather

You ever really REALLY want something to happen for someone else because you know it will send them over the moon with happiness?

This is just regular happiness. Imagine what over-the-moon happiness would look like.

Then you know how I felt about getting Heather to successfully grow tomatoes.

Secretly, just between you and me, I knew she could do it.

She wanted it SO MUCH that it was just a matter of connecting her hands (albeit from within the confines of gardening gloves) with the soil in her own custom designed kitchen garden.

Custom designing doesn't always mean HUGE. Obviously.
So we plotted and we planned and we carefully chose a tomato plant and then we picked out a few more plants just because once you get started it's hard to stop at just one plant and then...well, I won't ruin the surprise.

Tell us, Heather - how'd you do? Did you get to pick a ripe sun-warmed tomato right off of your own homegrown plant?
I did, indeed, and it was amazing. A true story - I grew up in the Midwest and had never had a fresh-from-the garden tomato until I moved to California. I used to think that all tomatoes were pinkish and mealy and now I know better. I’m such a fan.

No pinkish mealiness here.

And how was it?
Amazing. I thought I had died and gone to tomato heaven. They were huge and so flavorful.

Huge indeed.

What variety did you grow?
Top Sirloin - a big beefsteak variety.

An Indie Farms Top Sirloin, to boot.

What was your favorite way to eat your beautiful tomatoes?
Caprese salad - tomato, fresh mozzarella, basil (also from the garden), balsamic vinegar & olive oil, salt & pepper to taste. Perfection. 


Looks like perfection to me.

What else did you grow?
2 types of basil (Thai and Genovese) and a wee yellow pepper plant.


Was growing your own vegetables and herbs as hard as you thought it was going to be?
Yes and no. It was amazingly easy to set up with Jessica’s help and her emails/project list made buying the supplies a snap. I was just very nervous about doing right by my plants - I was a bit timid in the beginning to prune or pick or touch them too much. Fortunately, Jessica was there for all my crazy questions and moral support so now I can prune like a pro. 

So profesh.

Did you get a lot out of your garden?
What, like spiritually? I kid. Yes, we got loads of basil and more tomatoes than any two people could eat. I gave some away, tearfully, to friends and family to share the love. The yellow pepper plant made three proud peppers and one less proud one but they were all equally tasty.

Small but mighty.

What will you do now that the summer gardening season is over?
Plant my cover crop because I do what I’m told. 

Pacific Gold Mustard cover crop

Do you think you'll grow tomatoes (and maybe a few other things, too) next year?
Yes! Yes! Yes! I want to try more varieties of tomatoes and who knows, maybe some more basil. The sky’s the limit!

And they know what they're talking about with that whole "sky's the limit" thing...

What was your favorite part about growing your own food for the first time?
Pointing it out to all my friends and family and saying “Look what I did!” Oh, and eating the benefits of my labors, of course. It was also great to know that it was completely organic. Wait, that’s three favorite things...

Nothing nasty here

What did you find to be the most helpful tool to keep your garden growing well this first time around? 
It’s a toss up between the helpful emails with the photos and the face to face time with Jessica, the expert. It’s so great to have someone looking at what you are looking at and telling you that you’re doing the right thing. She was always available and never made me feel like an idiot for not knowing how to pick a tomato or other simple things. 


Girlfriend knows how to pick a tomato now, that's for sure.

Any words of wisdom for other newbie urban farmers out there?
I can’t recommend enough the importance of working with someone with knowledge the first time around. I’m the type of person that prefers to learn by doing, so I’m sure there are resources out there that you can weed through (pun intended), but having someone so knowledgeable available for in-person demonstrations and one-off questions made a good experience GREAT! I think I am much more confident as a farmer after the in-person sessions than any amount of internet scrounging would have yielded. 


No weeding around in this garden.

Thursday, November 8, 2012

Citrus. It's not just important for pirates.

Indie Farms' Kumquat

Like making Russian Tea around the holidays? What about fresh squeezed orange juice for those family breakfasts? Planning to ruin some kids' Christmases by stuffing their stockings with Clementines?


That's right, I said it. Kids don't get excited about an orange in their stockings. I don't even celebrate Christmas and I know that.

But you still do it, don't you?

Right on. I'd do it too. Because I love Clementines and, hey, if someone's going to fill a sock with something for me, I'd rather it be sweet little citrus rather than big sweaty foot, am I right?

Who are you trying to fool with fruit in the stocking?

Anyway, I've gotten off track. What I wanted to tell you guys was that, if you want to make sure to have a big sweet (or tart) citrus harvest this winter in NorCal, now's the time to feed your trees.

They're blossoming, setting fruit and getting ready to go to the winter show right now and they need a snack before they go.

The timing and schedule for feeding citrus vary depending on who you talk to, but in the test garden, we feed our potted and planted citrus on a monthly basis with an organic citrus food like Dr. Earth's Fruit Tree Fertilizer. Then we reap a mighty harvest all winter long without fear of the scurvy that plagued our seafaring ancestors.

Arrrrr! Avast ye matey!

What?

Yeah - just making sure you're still paying attention.

Feed me, Seymour.
Feeding your trees is easy:
  1. Measure out the recommended amount (based on the size of the tree's trunk) into a garden-only measuring cup.
  2. Pour it around the base of the tree.
  3. Mix it in to the surface of the soil by hand.
  4. Water it in well.
  5. Walk away for a month. (But still water when the soil is dry to the touch)
This will keep your fruit trees well fed so that, in return, they can make you some food. And fodder for Christmas stockings, much needed adult beverages, holiday gifts (that also happen to be adult beverages) and remedies for cold and flu symptoms.

Want more citrus recipes? Check it.

Medicinal produce that does not require a special card.