Showing posts with label Broccoli. Show all posts

Wednesday, June 25, 2014

The summer garden's top 3 OH NOs and their solutions

About this time of year, we start getting frantic OH NO emails from clients whose gardens are doing crazy things and, in some cases, nothing at all.

There's a lot of OH NOing and WHAT THE HELL DO I DOing and general freaking out and that is AOK.

We're on the case.

Here are the top 3 summer garden OH NOs and what you can do to sort them out. Without freaking out. Or...with minimal freaking out.

Seeds don't germinate

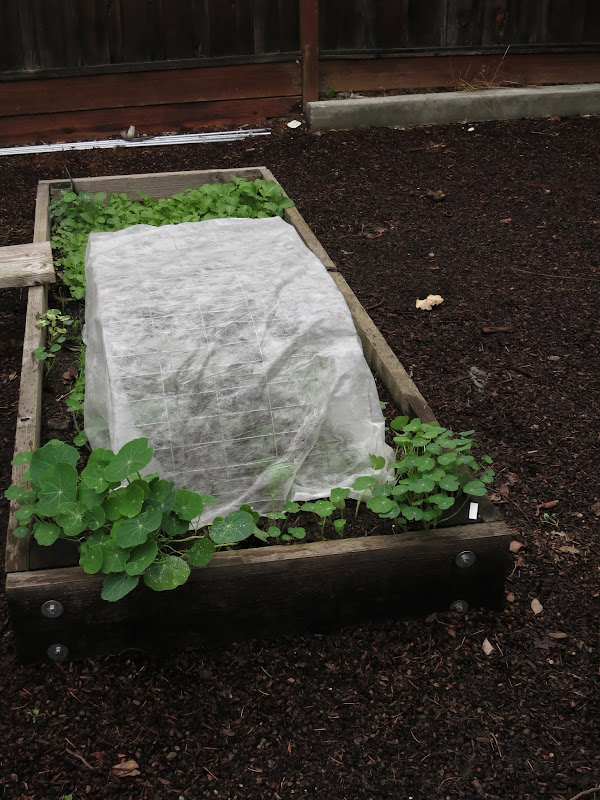
This is our woe this summer, again, because sometimes we can't learn from our previous season's mistakes. Specifically, that we can't keep the hot San Jose soil mo-ist enough long enough for forever-taking seeds like carrots to germinate.

Um...carrots? Helloooo?
Some measures you can take to make sure you have good germination rates for direct sown crops (where you put the seed right in your garden soil rather than starting it indoors first) is to know the crop's ideal sowing and germination conditions (in the case of carrots it's 1/4" seed depth, soil temps of 55-80 degrees, even water, consistent moisture, loamy soil with limited soil crusting) and follow them to the letter.

These tiny carrot seeds are the forever-takingest (20 days to germinate) of the direct sown seeds.

You can find this information on your seed packets and it's mightily helpful in getting a good stand (full germination of your crop in the garden) and final product.

If you have poor germination rate or none at all (like our poor carrots), you can adjust your conditions to suit the crop and resow, choose another crop to grow in the conditions that you DO have or, like we'll be doing, just let your nearby crops take over (AKA - Do nothing).

We'll try this again in the fall.

Blossoms fall off

When the temps spike, I start to get a lot of emails and pings from Indie Farmers worried about the blossoms falling off of their tomatoes.

In this case, some set fruit and some dropped off.

I get the same emails and pings when we have a super windy spell or it suddenly gets cold or a black cat crosses under a ladder nearby.

And that's all because of stress. When tomatoes get stressed - by temperatures that move outside of their ideal range (70-85 degrees), wind tossing around their leaves and branches, air pollution, lack of nutrients, pest attack, etc - they go into survival mode, just like all plants do.

And survival mode in plants looks like blossoms dropping, slowing of growth, fruit that doesn't ripen - that kind of thing. Because the plant is conserving energy to survive and the creation of flowers, setting of fruit on those flowers and ripening of fruit are the most energy consuming of the plant's activities.

So, the key to YOU surviving the plant's survival mode is to help the plant along. Look at the conditions the plant is experiencing and help it out.

If it's been really windy, put up a wind break around your plants, stake their branches so they don't break in the wind, or (if it's in a pot) move it to an area that's more protected.

The staking and protected space keeps this wee tomato plant from getting wrecked.

If it's been really hot, give your plant some afternoon shade with shade cloth, make sure you're watering deeply in the cool morning hours and limit the time you spend working the plants to the cooler morning hours.

Once conditions return to those that the plant likes best, it will go back to setting flowers and fruit and ripening that fruit. Healthy plants also fight off pests much more effectively and don't attract pests like sickly plants do.


Everything bolts super fast

When conditions move outside the range that your plants prefer (in the case of summer, it gets HOT), you'll notice your crops like lettuce, basil, cilantro and broccoli will start to send up tall stalks that eventually flower and set seed.

Look familiar? Oh, cilantro.

This is, again, your crop's way of surviving by producing the next generation (AKA - seed) and the heat is also a signal to cool season crops that it's time to procreate and survive.

Some crops like basil can be pinched to prevent bolting, but other crops like lettuce and cilantro will become bitter and tough even if you do prune off their flowering stalks.

Pinch me! Pinch me! Naughty.

For the cooler crops that you do want to grow during the hot summer months, try moving them to an area that gets afternoon shade or GIVE them afternoon shade where they're growing already, sow seed on a tighter schedule (every week rather than every other week) and harvest regularly to keep them in production mode.

Lettuce might like to grow in the shade of your bean tipi. Just sayin'.

Friday, September 6, 2013

The deal with growing fall and cool weather crops


This end-of-summer time is sort of confusing when it comes to timing the next season's crops and that's because you're usually thinking about two separate crop seasons at the same time: Fall and Winter (or cool weather).

It starts to get tricky because there are long-winded summer crops like tomatoes that you're likely to let linger on in the garden until the first frost hits (MUST HAVE EVERY LAST TOMATO BEFORE WINTER) and that keeps garden space occupied where you could be growing new stuff and also because fall and winter/cool weather crops have specific temperature and light needs that don't necessarily mesh with the weather outside.

Anyway, so that we don't confuse you further - here's a quick and dirty guide for how we get the most out of both our fall and winter/cool weather crop seasons while also letting our tomatoes linger on waaaaaaaaay too long...

Fall crops

Timing: Sow direct in the garden with enough time to mature and harvest before the first frost (usually around 12/1). For us in Silicon Valley, this planting time falls between August and September.
Location: Wherever you have empty spaces left from summer crops you've already pulled or those that desperately need pulling. Hello, tomatillos - we're looking at you. 
Treatment: Since these are seeds and young plants, it's also a good idea to plant them where they'll get afternoon shade so that they don't fry in the late summer heat. Please - for the plant's sake - dig in some nice well-rotted compost before sowing these seeds and then keep them constantly moist by watering 1-3 times a day, or whenever you see the soil's surface turn a light brown.
Type: Fast growing crops work best here, since you have just enough time from August/September - October/November to go from seed to harvest (about 45 days).
Beets - Baby leaf greens in 35 days and beet roots in 55 days
Carrots - Sow these guys with radishes (to mark where you sowed your carrots, which are slow germinators) for a harvest in 56 days
Cilantro -  You'll have your first leaves in a month and full harvest in about 50 days
Fennel - Sow non-bulbing fennel seeds for flavorful fresh salads and coleslaw in 50 days
Lettuce - This mix is pelleted (tiny lettuce seeds are made manageable by a pellet coating) and diverse, giving you profesh looking salads in 55 days

Winter/Cool weather crops 
Timing: Sow into flats now for transplanting out in the garden once your summer and fall crops are out of the way and the warm weather has passed, with temps below 70 during the day. For us in Silicon Valley, this is usually around the end of October/beginning of November.
Location: In flats/pots placed either under lights indoors or in an outdoor spot that gets afternoon shade.
Treatment: Rather than sowing these direct in the garden right now while the soil's super warm, sow them into flats or pots and either start them indoors under lights or outdoors where they'll get afternoon shade.  Please - for the plant's sake - use new potting soil rather than reusing old spent stuff, and when you go to plant them in the garden, dig in some nice well-rotted compost first. Keep them constantly moist, so water 1-3 times a day, or whenever you see the soil's surface turn a light brown.
Type: Crops that prefer cool weather and will take a frost without keeling over.
Broccoli - Crunchy sweet broccoli with abundant side shoots (bonus!) in about 90 days
Cauliflower -This fast producing variety hates heat, so transplant when it's cool (below 60 degrees) and has 4-5 true leaves for harvests in about 65 days
Onions - Bunching onions in 60+ days and medium bulb onions in 115+
Kale - 25 days from sowing these seeds you'll have baby greens to eat fresh in salads or wait another 25 days for big bunchy harvests
Spinach - Spinach just like you're used to seeing, but fresh from your garden in 40 days. Plant in a spot that gets afternoon shade since they're sensitive to heat.

And if you're curious what should be planted where or you want to build a crop rotation plan, we have some examples and suggestions on the subject. Because, well, when don't we?

So - what are you going to be growing this fall and winter? 

Thursday, January 3, 2013

Better with frosting

De cicco Broccoli

For a long time I just took other gardeners' word for it when they'd say that Brussels sprouts, broccoli and other Brassicas (the genus from which all of these lovely and sometimes misunderstood vegetables hail) were sweeter after a frost.

Pacific Gold Mustard

I mean, it's easy and nice to plant things that can take a frost and don't need to be covered. It appeals to the lazy I HAVE A MILLION THINGS TO DO ALREADY part of me that really doesn't want to have to go out to the test garden before bed to throw sheets over plants and tuck in stray branches and such.

Vitaverde Cauliflower


But that's as far as my understanding went. Brassicas can take a frost and are therefore awesome and worthwhile to grow in the frosty time of year when most other plants need all kinds of special care that I don't have time for.

Churchill Brussels sprouts

The fact that they also became sweeter after a good frost set in, well, that was a nice bonus. Especially when things like nasturtium, that are totally frost tender (ie. they totally croak when it's frosty), turn to absolute goo when the temps drop into the frosty range.

Nasturtium goo

I don't enjoy goo in the test garden. Just ew.

Sweetness and frost hardiness, though? Definite like.

But eventually I got all, "BUT WHY do they taste sweeter after a frost? I must know." and thankfully I had my horticulture professors, farmy friends and the Internet to bring me up to speed.

And this is where it gets cool and semi-science-y out in the test garden.

Don't freak out though - science can be cool! Promise.

See, when the temperatures drop, Brassicas start producing more sugars in order to lower the temperature that freezing begins in the water in their leaves so that they can survive the cold weather and not turn into a useless and gross pile of goo.

They want to live! We want to eat their sweet lively leaves! Oops.

More sugars = less water to freeze = higher frost tolerance = no need for cover (hardy to about 5 degrees) = really good eating.

So, go out to that garden of yours and pick some Brassicas for a salad, stir-fry, lunch, dinner, breakfast or dessert.

Seriously.

If you're curious about some of the tasty bits in the Sweeter After a Frost Brassica Genus:
  • Broccoli
  • Brussels sprouts
  • Cabbage
  • Cauliflower
  • Collards
  • Kale
  • Mustard greens
Eat me.


Thursday, November 29, 2012

Build a sturdy crop cover

I guess this time of year is all about cover.

Cover crops, crop covers, covering your bod from the cold...that kind of thing.

The one thing all of these coverings have in common is that they're only good if they're actually, you know, COVERING things.

What I'm trying to say is that they're no good if they're blowing around your yard or whoknowswhere instead of your cover-needing crops, am I right?

Um, do you feel a draft? I feel a draft.
It's OK, you can say it - I'm right.

Crop covers need to be sturdy, hardy and battened down so that they do their job while the winter weather rages outside with the evil cabbage moths, carrot flies and other EW GROSS NOT ON MY PLANTS YOU DON'T no-no pests that want ever so badly to consume your plants before they can produce the vegetables that you want.

So, let's build a nice sturdy crop cover, shall we?

Again, the answer here is yes.

These crop covers are good for fragile plants that need cover, but don't appreciate having the cover draped right over their little growing bodies. These covers also make it easy to cover only those plants that need cover in a multi-crop bed and they're easy to remove when you want to check on your plants' well-being between winter storms.

Build a sturdy crop cover

Materials

  1. Medium gauge wire mesh (chicken wire works well, too)
  2. Lightweight permeable cloth like this
  3. 4 clothespins
  4. 2-4 garden staples per row cover

How-To

  1. Measure the area you'll be covering and determine the final height of the plant you intend to cover. Add these two numbers together and cut your wire mesh.

    So, if your area is 2' wide and you're growing broccoli that will get to about 1' tall, you'll cut your mesh to 3'.

    This way you can form an arch tall enough to accommodate the final height of your plants.

    It doesn't need to be exact, but you don't want to end up with your plants all smashed against the cover since that could keep them from reaching their potential, inhibit air flow and other annoying no-nos.
  2. Measure out enough of the cloth so that it's at least 4 inches longer than your wire mesh, cut it and drape it over the top of your mesh.

  3. At each corner, twist up the excess cloth and pin it taught to the mesh with your clothespins.


  4. Do that on all sides.

  5. Cover your crops

  6. Pin down either end or all four corners (you decide how STAY PUT you want to be about it) with your garden staples.
That's all, folks. 

That's better. Now I can run around nude.

Friday, June 15, 2012

Broccoli noodle salad

Broccoli Noodle Salad
Recipe by moi

Ingredients
Broccoli, 1 head cut into florets
1 large carrot, shredded
1 handful of string beans, halved, tips removed (optional)
1 serving of rice vermicelli noodles
4 t fish sauce
2 T fresh lime juice
1 clove garlic, minced
2 T sugar
1/2 t garlic chili sauce

Noodle salad
Prepare vermicelli according to package directions and don't forget to rinse with cold water and set aside to drain well.
 
Steam broccoli, carrots and beans for 5-7 minutes or until tender crisp and not limp. Rinse in cold water and set aside.

Sauce
Whisk together fish sauce, lime juice, garlic, sugar and chili sauce in a large bowl. Then dump in noodles and steamed vegetables. Toss until noodles and vegs are completely coated with the sauce and allow to stand briefly for the flavors to get all mingley.

Eat with chopsticks if you're feeling exotic or with your feet if you're feeling grody yet coordinated.

Enjoy.

Saturday, April 14, 2012

Roasted broccoli with walnuts and prosciutto

This was another tested recipe. This time from RealSimple.

I adapted it to use what I had on hand, plus add a bit of delicious pork, which you'll likely find is a theme around here.

We love our vegetables, obviously, but we're not in the business of offending the regal edible beasts of the land. And so, we add them to our menus, too.

Roasted broccoli with walnuts and prosciutto

Just make the recipe as shown, but sub out orecchiette for whatever small-ish pasta you have on hand (I had whole wheat penne), stir chopped prosciutto (YAY! PORK!) into the mix when you add the broccoli to the pasta, and toss with a bit of asiago, provolone and Parmesan. And if yer real fancy-like, add a bit of black truffle oil. BUT ONLY IF YER FANCY-LIKE.

Also, enjoy.

Friday, November 25, 2011

Vegetable beef soup

Does this recipe sound sorta boring to you?

It might. That's OK. It kinda does to me, too. Except that I've had it and I know the truth.

It's downright amazing.

And if you doubt that vegetable beef soup can be amazing, then I really think you should try this recipe using, if you have it, your own preserved tomato juice, homegrown vegetables and homemade gravy.

If you don't have all those things I just mentioned and have to jaunt off to the store for some of them, that's totally OK.

We don't judge you at Indie Farms. We just ask that you try growing things so that you can eat good food.

Go on, then.

Vegetable beef soup

IngredientsChopped pot roast (this is a great way to get rid of leftover pot roast) or cooked stew meat
1 medium celery root, peeled and chopped into bite sized pieces 
3 cups of mixed bite-sized vegetables like peas, corn, green beans and carrots
2 heads' worth of broccoli florets
1 quart of tomato or vegetable juice
1 can of beef consume
2 T beef gravy
4 cups of water
1 T dried oregano
1 T ground thyme
Lots of fresh ground pepper

To makeIn a big stock pot, pour in your vegetable juice, consume, gravy and water. Then add in your chopped meat, celery root, mixed vegetables, herbs and broccoli. Stir it together well and cover.

Bring to a boil and then reduce to low to simmer for about 45 minutes to an hour. 

Before you serve, give it a taste and add as much pepper as you like. We like a lot, so I added a good bit. You may be surprised that this recipe doesn't call for salt, since I LOVE salt, but with the vegetable juice and gravy and pot roast, it's PLENTY salty. But, if you must, go ahead. I won't laugh and point when your fingers swell into hot dogs.

Like mine do.

Good eating, friends.